
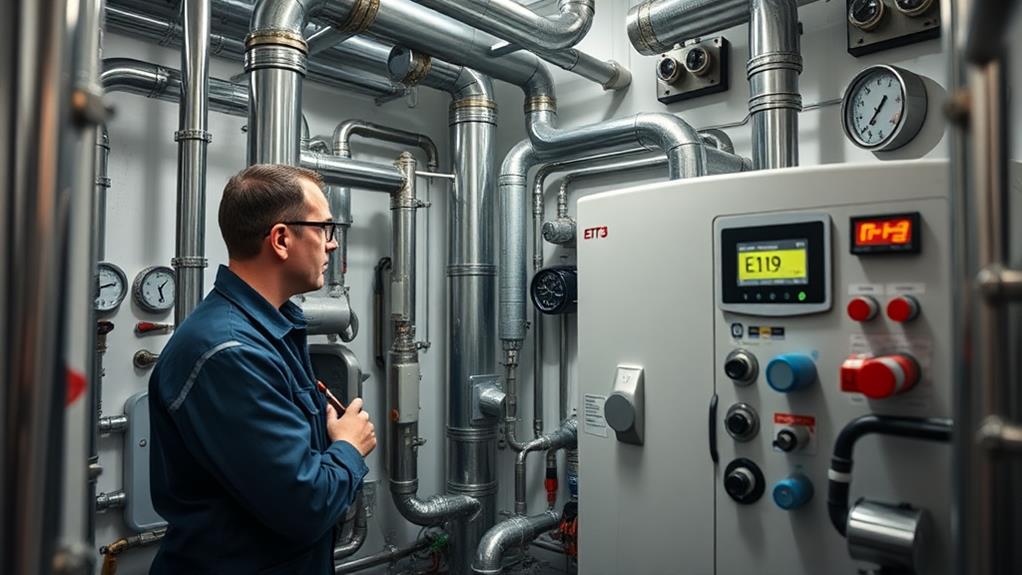
If you see the E119 error code on your boiler, it indicates low pressure, usually below 1 bar. Start by checking the pressure gauge; it should be between 1 and 1.5 bar when the boiler is cool. Inspect for leaks in pipes or radiators and verify valves are fully open. Bleed radiators to release trapped air that can cause pressure imbalance. If issues persist, it might be a faulty pressure sensor or relief valve. Regular maintenance can prevent future errors. For more steps to maintain peak boiler performance, consult professional maintenance guidelines and troubleshooting techniques.
Key insights
- E119 indicates low pressure in the boiler, requiring immediate attention to prevent operational issues.
- Check the pressure gauge; ideal readings are between 1 to 1.5 bar.
- Bleed radiators to remove trapped air and stabilize pressure.
- Regular maintenance helps identify leaks, airlocks, and faulty components early.
- Consult professionals for persistent E119 errors or if basic troubleshooting fails.
Understanding the E119 Error Code

When your boiler flashes the E119 error code, it’s signaling a problem with low pressure in the system. This issue is crucial as it can disrupt the boiler’s efficiency and potentially halt its operation. Regular commercial boiler service is necessary to prevent such issues and guarantee the system’s ideal performance. To address the E119 error effectively, you need to engage in precise pressure troubleshooting. Start by checking the pressure gauge on your boiler. Ideally, it should read between 1 to 1.5 bar when the system is cool. If it’s below this range, your system’s under pressure, necessitating immediate attention.
To resolve the E119 error, you’ll need to perform some essential boiler maintenance. Begin by locating the filling loop, which consists of two valves or a key, depending on your boiler model. Slowly open the valve(s) or use the key to allow water into the system, watching the pressure gauge carefully. Once it reaches the recommended level, close the valves or remove the key. Be cautious not to overfill, as excessive pressure can cause further issues.
Regular maintenance and monitoring are crucial to prevent recurrence. Verify you check the pressure periodically and familiarize yourself with the user manual for specific guidance related to your boiler model.
Causes of Low Water Pressure
Addressing the E119 error code requires understanding the underlying causes of low water pressure in your boiler system. A common culprit is inadequate water flow, which can stem from a variety of issues. One potential cause is a closed or partially closed stopcock, which restricts water entering the boiler. As part of plant room maintenance, it’s essential to guarantee that all valves in your pressure systems are fully open to facilitate best water flow.
Another factor to take into account is the potential presence of leaks within the system. Regular inspections, an essential aspect of preventative maintenance, can identify these issues early on. Leaks can occur in various places, such as pipes, radiators, or the boiler itself, leading to a gradual drop in pressure. Inspect your system for any visible signs of water escaping, such as damp patches or puddles.
Airlocks in the system can also impede water flow, causing pressure imbalances. Bleeding your radiators can often resolve this issue by expelling trapped air. Additionally, debris or mineral deposits in the system may obstruct water passage, affecting pressure. Regularly flush the system to remove any build-up.
Diagnosing the E119 Error

When diagnosing the E119 error, you’ll need to identify common causes such as low water pressure, faulty sensors, or airlocks in the system. The error might be due to an issue that requires professional advice on maintenance schedules or even emergency repair services. Start by checking the pressure gauge to confirm it’s within the recommended range, typically between 1.0 and 1.5 bar. If the pressure is adequate, inspect the pressure sensor and bleed any trapped air to resolve the error.
Common Causes of E119
Understanding the common causes of the E119 error code on your boiler is essential for effective troubleshooting. This error typically signals an issue with boiler pressure, a critical aspect of boiler maintenance. One common cause is low water pressure, often resulting from leaks in the system or insufficient water feed. You should regularly check the pressure gauge, making sure it stays within the manufacturer’s recommended range.
Another potential cause is a malfunctioning pressure relief valve. If this valve is faulty, it can prevent the system from maintaining the correct pressure, triggering the E119 error. A blocked or partially closed filling loop can also disrupt pressure regulation, leading to similar issues.
Air trapped in the system is another culprit. It can cause pressure fluctuations, as trapped air pockets prevent water from circulating effectively. Regularly bleeding radiators can help alleviate this problem.
Lastly, the pressure sensor itself might be defective. If it provides inaccurate readings, your boiler may incorrectly interpret the system’s pressure state, resulting in an error code. Consistent boiler maintenance, including checking seals and components for wear, guarantees peak performance and reduces the likelihood of encountering the E119 error.
Steps for Error Resolution
To effectively diagnose the E119 error, start by evaluating the boiler’s pressure gauge. The E119 code often indicates low water pressure within the system. Check if the pressure reading falls below the recommended level, typically 1.0 to 1.5 bar. If it’s below this range, you’ll need to address the pressure regulation immediately.
Next, verify the filling loop valves are properly closed. Open them slightly to allow water to enter the system and watch the gauge as the pressure increases. Once you’ve reached the ideal level, close the valves to prevent over-pressurization. This step is critical in boiler maintenance to avoid recurring issues.
Inspect the system for any visible leaks, which can cause a continuous drop in pressure. Examine joints, radiators, and pipes for moisture or drips. If you identify a leak, it might require sealing or professional repair.
Additionally, bleed the radiators to expel trapped air, which can interfere with pressure stability. Use a radiator key to open the bleed valve until water flows steadily, then close it tightly.
Steps to Fix the Error
To resolve the E119 error code on your boiler, start by checking the pressure gauge to confirm it’s within the recommended range. This is a vital step in maintaining the safety and efficiency of your gas appliances, similar to the inspections conducted by a Gas Safe registered engineer. If the pressure is low, bleeding the radiators carefully can help restore balance and prevent further issues. Be certain to use the correct tools and follow safety protocols during the process.
Check Pressure Gauge
Start by locating the pressure gauge on your boiler, which is typically found on the front panel or near the control interface. This gauge provides you with critical pressure readings necessary for diagnosing the E119 error code. In most systems, the ideal pressure level should be between 1.0 and 1.5 bar when the boiler is cold. Deviations from this range could be the source of your problem.
Here’s a step-by-step guide to check your boiler’s pressure gauge:
- Identify the pressure reading: Look at the gauge and note the current pressure level. If it’s below 1.0 bar, you likely have a low-pressure issue contributing to the E119 error.
- Inspect for physical damage: Verify the pressure gauge itself isn’t damaged or malfunctioning, as this could lead to inaccurate readings.
- Check for consistency: Compare the pressure reading with any digital displays or control panels on your boiler to verify consistency.
- Adjust settings if needed: If the pressure readings are outside the ideal range, prepare to adjust the water pressure to correct it.
Bleed Radiators Carefully
Having checked the pressure gauge and identified any irregularities, let’s address the next step in resolving the E119 error: bleeding the radiators. This is a vital aspect of radiator maintenance, as trapped air can lead to inefficient heating and pressure imbalances, triggering the E119 error code.
Start by ensuring the heating system is turned off and cool to touch to avoid burns. Locate the bleed valve on each radiator, typically found at the top corner. Use a radiator key to turn the valve counterclockwise. As you do this, be prepared with a cloth or small container to catch any escaping water. Listen for a hissing sound, indicating air is being released. Once the hissing stops and water begins to dribble steadily, close the valve tightly by turning it clockwise.
Repeat this bleeding technique for all radiators in the system. After bleeding, check the boiler’s pressure gauge again. The ideal reading should be between 1 and 1.5 bar. If the pressure is still low, you may need to top up the system with water. By following these precise radiator maintenance steps, you’ll improve system efficiency and potentially resolve the E119 error.
Preventing Future Occurrences
A boiler’s perfect performance hinges on regular maintenance and timely intervention to prevent the recurrence of the E119 error code. By implementing targeted strategies, you can guarantee your boiler operates efficiently, minimizing disruptions and potential damage. Power flushing, a process involving the circulation of high-pressure water mixed with cleaning chemicals through your heating system, can be particularly effective in maintaining your boiler’s health Commercial Power Flush. This process cleanses the system of sludge, rust, and debris that can cause inefficiencies and breakdowns, as well as triggering error codes like E119. Begin by focusing on regular maintenance, as periodic inspections help identify issues before they escalate.
To prevent future occurrences of the E119 error code, consider the following measures:
- Conduct Regular Maintenance: Schedule annual check-ups to inspect pressure levels, valves, and pipework integrity. This proactive approach helps catch potential issues early.
- Monitor Pressure Levels: Regularly check the boiler’s pressure gauge to confirm it’s within the manufacturer’s recommended range. Consistently low pressure often triggers error codes.
- Implement System Upgrades: Retrofit your boiler with modern components, such as pressure sensors and automated pressure regulators, which enhance reliability and efficiency.
- Guarantee Proper Ventilation: Make sure your boiler has adequate ventilation to prevent pressure build-up and guarantee peak combustion. Blocked vents can lead to frequent error codes.
When to Call a Professional
While regular maintenance and preventive measures can greatly reduce the chances of encountering the E119 error code, certain situations necessitate the expertise of a professional. Regular inspections by Gas Safe registered engineers can guarantee your heating system’s compliance with safety standards and enhance its reliability. If you’ve exhausted basic troubleshooting steps, such as bleeding radiators or checking the pressure gauge, yet the error persists, it’s time to call a professional.
An expert can perform thorough diagnostics and identify underlying issues that might not be evident during routine boiler maintenance. A professional should also be consulted if you notice unusual noises, persistent pressure drops, or water leaks around your boiler. These symptoms can indicate more severe problems requiring emergency repairs. Attempting to rectify such issues without proper expertise could lead to further damage or safety hazards.
Moreover, if your boiler frequently displays the E119 error despite regular maintenance, this could signal a malfunctioning pressure sensor or a failing expansion vessel—components that require a professional’s precision to repair or replace. By involving a professional, you guarantee that any necessary emergency repairs are conducted safely and efficiently, ultimately prolonging your boiler’s lifespan and ensuring peak performance. Ignoring these signs can compromise your heating system, leading to more extensive and costly repairs down the line.
Frequently Asked Questions
Can the E119 Error Code Affect My Boiler’s Efficiency?
Yes, an error code can affect your boiler’s efficiency. When you encounter an issue, boiler performance may decline, potentially leading to more energy consumption. Begin with error code troubleshooting to identify the problem. Check for common causes like pressure drops or sensor malfunctions. By addressing the error promptly, you can restore ideal boiler performance and prevent further inefficiencies. Proper maintenance and timely repairs guarantee your system runs smoothly.
Is the E119 Error Code Common in All Boiler Brands?
When you’re faced with an E119 code, it’s essential to understand that it doesn’t universally appear across all boiler brands. Boiler brand differences mean that the E119 code causes can vary greatly. Some brands might frequently experience this issue due to specific design elements, while others may rarely encounter it. Always consult your boiler’s manual or a professional technician to troubleshoot effectively and prevent potential system inefficiencies or failures.
How Often Should I Check My Boiler for Potential Error Codes?
You should check your boiler for potential error codes at least once a month. Regular boiler maintenance helps you catch issues early and guarantees efficient operation. During your routine check, focus on error code troubleshooting to identify any problems. Look for any displayed codes and refer to the manual for solutions. Consistent monitoring allows you to address minor issues before they escalate, guaranteeing your boiler runs smoothly and reliably.
Can Weather Conditions Trigger the E119 Error Code?
Weather impacts can indeed be error triggers for boilers. When temperatures drop, the risk of frozen pipes increases, potentially leading to pressure issues. You should verify your boiler’s pressure is within the recommended range, especially during cold weather. If the pressure drops too low, the system might display an error code. Regularly check the boiler’s pressure gauge and insulate exposed pipes to prevent weather-related malfunctions.
Does the E119 Error Code Require Specific Tools for Repair?
When dealing with error codes, you’ll need repair tools, you’ll need troubleshooting strategies. First, gather a multimeter and a set of wrenches for precise diagnosis. Use a pressure gauge to guarantee system balance. Apply logical troubleshooting strategies: check for leaks, inspect connections, and test pressure sensors. These steps, using the right tools, help guarantee accurate repairs. Consult the manual for specific tool recommendations and follow safety protocols for effective problem-solving.
Summary
To resolve the E119 error code effectively, think of the process like tuning a musical instrument—precision is key. By understanding the causes and diagnosing the issue, you can restore your boiler’s ideal function. Regular maintenance and monitoring prevent future occurrences, ensuring your system runs smoothly. However, if you’re unable to fix the problem or feel uncertain, it’s essential to call a professional to avoid further complications and safeguard your boiler’s longevity.